bootstrapping debian on my sbc
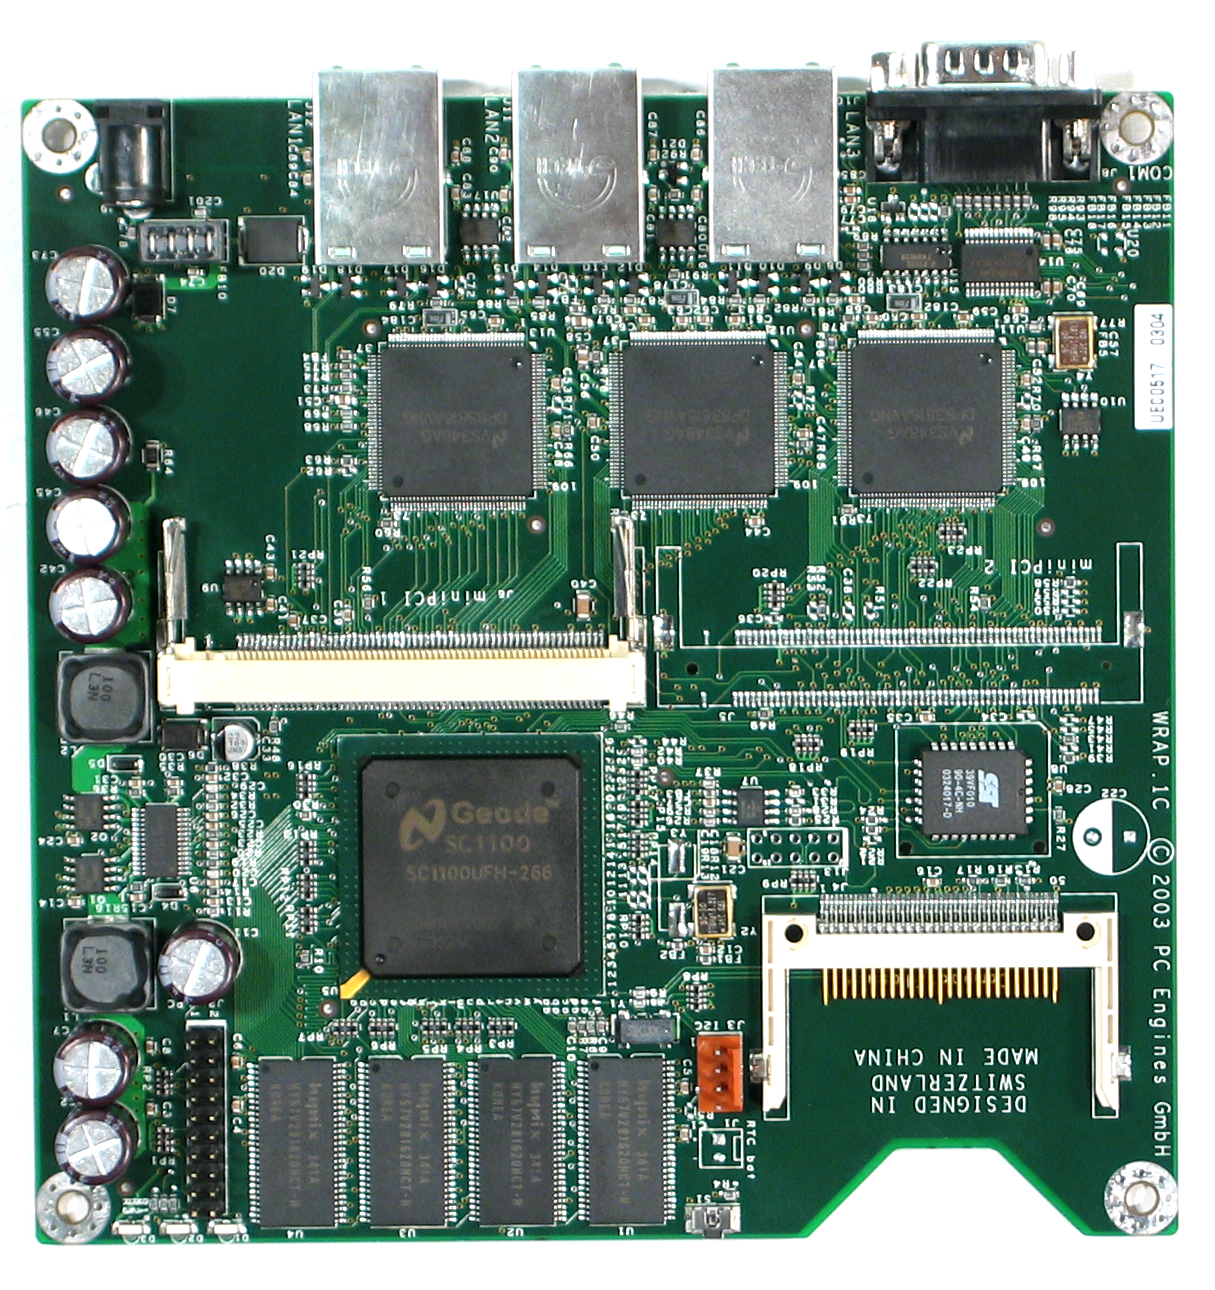
So my [sbc]{tag/sbc} of choice these days is the WRAP 1C-2. This model is powered by a 266Mhz Geode and has 128M of RAM, a CF reader, 1 mini-PCI slot, a serial console and 3 10/100 Mbit NICs. I get mine (I have three now) from Xagyl Communications. Each was about $200.
This entry talks about bootstrapping debian onto a CF card.
A few notes on hardware I have.
-
I have noticed that my USB CF card reader failed to run lilo or grub to install the bootloader. I am using my PCMCIA CF card reader in my laptop. It works. I am not sure what the limitation was with USB, I have not tried it recently.
-
My kernel is 2.6.16.
-
I am running a recent install with udev.
-
my boot dis is /dev/sda, which means that my CF card is /dev/hda. This is nice because I can have only one lilo.conf file for installing and for booting on the hardware. If you boot of /dev/hda make sure you don’t accidentally overwrite your system’s bootloader.
The procedure is:
-
get the CF card mountable, this will depend on your setup. I ran:
$ fdisk /dev/disk/by-id/ata-SanDisk_*
Add a single partition of type Linux and make it bootable
$ mkfs.ext3 /dev/disk/by-id/ata-SanDisk_*-part1
Mount it
    $ mkdir /mnt/flash
    $ mount /dev/disk/by-id/ata-SanDisk_*-part1 /mnt/flash
    $ mount -t proc none /mnt/flash/proc/
-
install base system
$ debootstrap --arch i386 etch /mnt/flash/
Make a few device nodes…
    $ mknod /mnt/flash/dev/hda b 3 0
    $ mknod /mnt/flash/dev/hda1 b 3 1
    $ mknod /mnt/flash/dev/console c 5 1
    $ mknod /mnt/flash/dev/null c 1 3
- do what the bootstrapping doesn’t do
You have to setup the following files manually. make sure you are editing the ones in /mnt/flash not the ones on root. I am providing my files as an example:
-
/mnt/flash/etc/fstab
/dev/hda1 / ext3 noatime,errors=remount-ro 0 1 proc /proc proc defaults 0 0 tmpfs /tmp tmpfs defaults,size=5M 0 0 -
/mnt/flash/etc/hostname
hostname.network.foo -
/mnt/flash/etc/hosts
127.0.0.1 localhost hostname 192.168.1.1 hostname hostname.network.foo -
/mnt/flash/etc/network/interfaces
auto lo eth0 iface lo inet loopback iface eth0 inet static address 192.168.1.1 netmask 255.255.255.0 -
/mnt/flash/etc/apt/sources.list
deb http://ftp.debian.org/debian testing main deb http://security.debian.org/ testing/updates main -
/mnt/flash/etc/inittab
this should be added at the bottom:
T0:23:respawn:/sbin/getty -L ttyS0 38400 vt100
-
finish off the install
 $ mount -t proc none /mnt/flash/proc
 $ chroot /mnt/flash /bin/su -
The following steps are ran in the chroot…
    # apt-get update
    # apt-get install configure-debian -y
    # configure-debian --all
When configuring the following are my recomendations
- debconf: dialog, medium
- use shadow passwords
You can now install whatever packages you want
# apt-get install openssh-server openssh-client
- make system bootable
(again from the chroot)
Install kernel and lilo.
# apt-get install mbr lilo linux-image-2.6-486 -y
When configuring say yes for a local symlink and don’t abort linux-image install, we will fix it in a bit.
Put this in /etc/lilo.conf:
      boot = /dev/hda
      disk = /dev/hda
        bios = 0x80
      disk = /dev/sda
        inaccessible

      prompt
      timeout=150
      vga=normal
      read-only
      serial=0,38400n8
      default=linux

      image = /vmlinuz
        initrd = /initrd.img
        root = /dev/hda1
        append="console=ttyS0,38400n8"
        label = linux
And then install the MBR.
** WARNING: this could kill your system’s disk. **
!!! read the comment above about my hardware !!!
** WARNING: are you sure you want to do this? **
    # install-mbr /dev/hda
    # lilo -M /dev/hda -C /etc/lilo.conf
- cleanup
Exit the chroot…
    # sync
    # exit
Kill all processes running inside the chroot:
$ lsof | grep /mnt/flash | awk '{ print $2 }' | xargs kill -9
Unmount…
    $ umount /mnt/flash/proc
    $ umount /mnt/flash
And you’re done.